24 February 2009 |
5
comments
Customize Your Embedded Video with Photoshop/CSS
Hello there, for this post, I would like to teach you "How to customize your embedded Youtube video in your blog".
When you put the embedded video such as Youtube video, the player just like this:
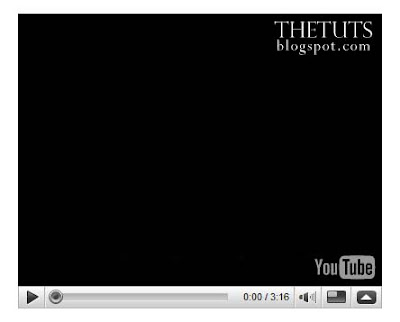
How to change the player to become this:

Step 1: Identify
Here is the code that you can copy on the right panel from Youtube.
The main part of the modification is the size of player.
width: 480px
height: 295px
Step 2: Photoshop part
Step 2.1
Create a New Document with width 530px and for the height is 345px to make the layout for our new player layout (increase the size to 50px or higher for the shadow).

Step 2.2
Create the dummy player for Youtube Player with the original size. Click on "Rectangle Tool (U)" and set the fixed size with the original player size (width= 480px, height = 295px). Choose "Grey" color for the foreground and click anywhere in your document. Place the "dummy player" at the center of the document.

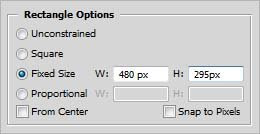
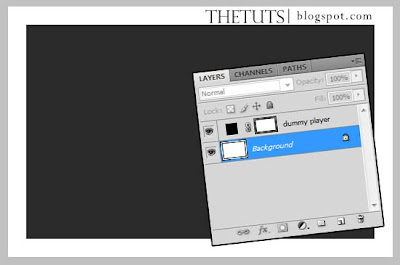
Rename the rectangle to "dummy player" to make your work become more easier.
Step 2.3
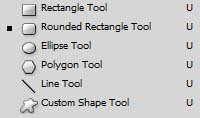
To make our own player, click "Rounded Rectangle Tool (U)", set the radius to 10px and choose "black" for the foreground. Click anywhere in your document and place it behind the "dummy player". Name it as "custom player".
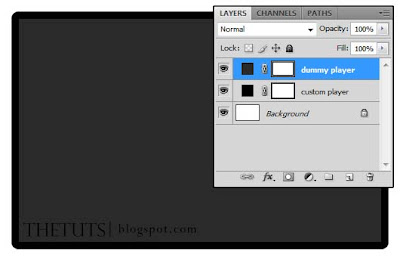
Step 2.4
Right click "custom player" in the Layers Panel, select "Blending Options" and choose "Drop Shadow". Just follow this setting.
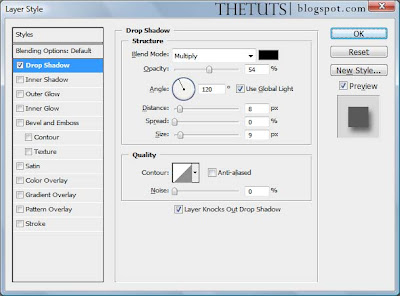

Step 2.5
Here come the tricky part. "Invisible" the "dummy player" layer and the background layer, then, take a "Slice Tool (C)" and cut to 3 slices (top, center and bottom).

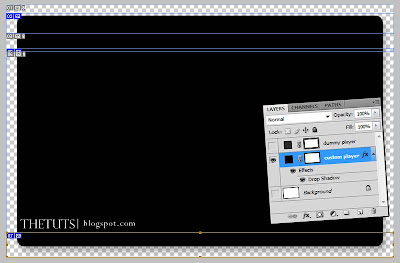 Step 2.6
When you're done with your slicing, go to "File > Save for Web and Devices". Press "Shift" and click "top, center and bottom" slice. Save it with "PNG-24"
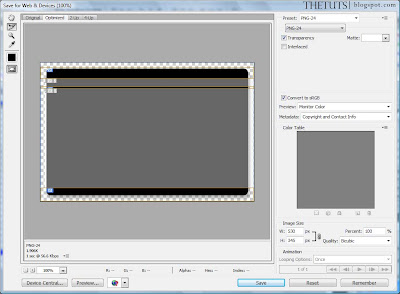
Okay, we're done with photoshop.
Step 3: CSS
Step 3.1:
Html
Explaination
v = the div for the player
vtop = load the top image
vbg = load for the center image and it repeating the horizontal
vbottom = load the bottom image
Step 3.2: CSS
Explaination
.v = we set the width for the player is 540px, and 372px for the height. Margin, Padding = Auto.
.vtop = load the top image called "top.png" and set the height for it or the image can't see.
.vbg = load "center.png" and keep it repeat-y (no need to set the height).
.vbottom = load "bottom.png", and set the height to the image size.
and here is your final result.

p/s: try our player with cross-browser, to avoid some 'craps' annoying the our visitor (I'm not a css expert, I still on learning process).
When you put the embedded video such as Youtube video, the player just like this:

How to change the player to become this:

Here is the code that you can copy on the right panel from Youtube.
The main part of the modification is the size of player.
width: 480px
height: 295px
Step 2: Photoshop part
Step 2.1
Create a New Document with width 530px and for the height is 345px to make the layout for our new player layout (increase the size to 50px or higher for the shadow).

Step 2.2
Create the dummy player for Youtube Player with the original size. Click on "Rectangle Tool (U)" and set the fixed size with the original player size (width= 480px, height = 295px). Choose "Grey" color for the foreground and click anywhere in your document. Place the "dummy player" at the center of the document.


Rename the rectangle to "dummy player" to make your work become more easier.
Step 2.3
To make our own player, click "Rounded Rectangle Tool (U)", set the radius to 10px and choose "black" for the foreground. Click anywhere in your document and place it behind the "dummy player". Name it as "custom player".


Step 2.4
Right click "custom player" in the Layers Panel, select "Blending Options" and choose "Drop Shadow". Just follow this setting.


Step 2.5
Here come the tricky part. "Invisible" the "dummy player" layer and the background layer, then, take a "Slice Tool (C)" and cut to 3 slices (top, center and bottom).

 Step 2.6
When you're done with your slicing, go to "File > Save for Web and Devices". Press "Shift" and click "top, center and bottom" slice. Save it with "PNG-24"

Okay, we're done with photoshop.
Step 3: CSS
Step 3.1:
Html
Explaination
v = the div for the player
vtop = load the top image
vbg = load for the center image and it repeating the horizontal
vbottom = load the bottom image
Step 3.2: CSS
Explaination
.v = we set the width for the player is 540px, and 372px for the height. Margin, Padding = Auto.
.vtop = load the top image called "top.png" and set the height for it or the image can't see.
.vbg = load "center.png" and keep it repeat-y (no need to set the height).
.vbottom = load "bottom.png", and set the height to the image size.
and here is your final result.

p/s: try our player with cross-browser, to avoid some 'craps' annoying the our visitor (I'm not a css expert, I still on learning process).
download the image here.

Terdapat 5 komen. Sudilah tinggalkan komen anda.
Luth Textile
wow..
cun!
y
tapi takde la cun cam ko punye..hehe =))
Anonymous
Looking to do similar but want to overlay it on top of the embed video so that the video is behind. I've tried z-index and several things but the video is always on top... any ideas?
#videooverlay {
width:575px;
height:355px;
position:absolute;
top:5px;
left:6px;
z-index; 10001;
background-image: url(../images/video-overlay.png);
padding: 2px;
}
y
Anon, try this Covering Embedded Video with Image
Blog StardustShining
Do you usually serve as an author just for this website or you do that for other online or offline portals?
Post a Comment
Sila gunakan bahasa yang sesuai dan iklan tidak dibenarkan disini
Please use appropriate language and NEVER advertise here.